To get started:
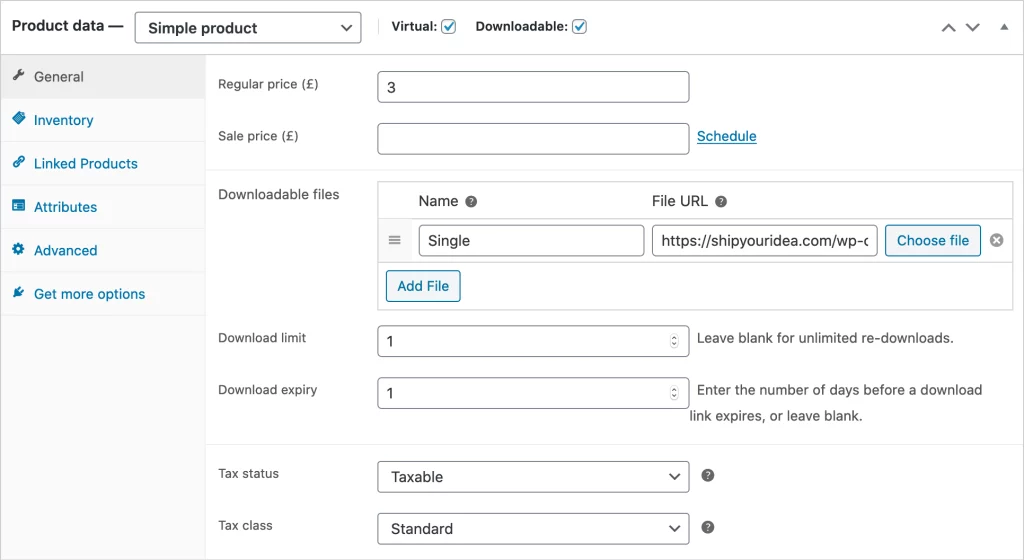
- Go to: Business Suite Dashboard>Shop > Add Product to add a new Simple product as outlined in Adding a Product.
- Tick the Downloadable checkbox:
- After ticking this box, other options appear – Downloadable Files, Download Limit, Download Expiry.
- Select the Add file button, and then name the file. Enter the downloadable URL if it’s hosted elsewhere, or select the Choose file button to either insert an existing file from your Media Library or to Upload a new file. Upload the file and click Insert to set up each downloadable file URL.
- Enter “Download limit” (optional). Once a user hits this limit, they can no longer download the file.
- Enter “Download expiry” (optional). If you define a number of days, download links expire after that.
- Once you’ve completed this edit to the product, press Publish or Update as usual.

ORDERING PROCESS
The ordering process for downloadable products is:
- The customer adds a downloadable product to their cart.
- The customer checks out and pays.
- After the payment, if items in the order are all downloadable + virtual, the order is completed.
- Once complete, the customer can:
- Be granted download permission
- See download links on the order received page
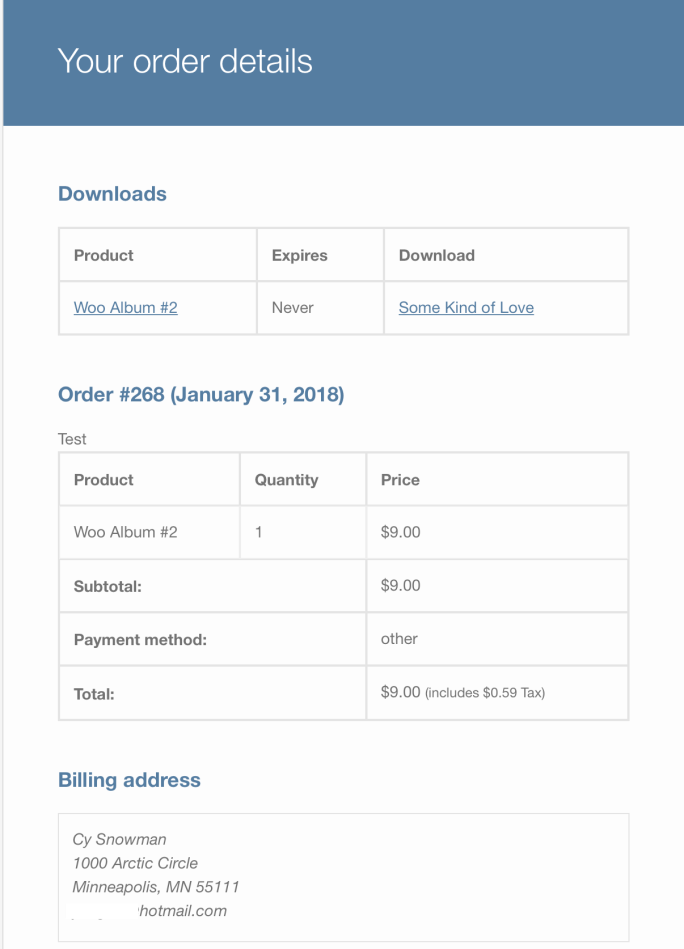
- See download links in their email notification
- See download links on their ‘My Account’ page if logged in
Customers can then download files.
INVOICE/ORDER EMAIL
The customer receives an invoice/order confirmation with a clickable link to download if the order is processed and paid.

