In order to receive payments from your website, you need to set up and connect a Stripe Account. It is free to set up an account and will allow you to take credit card payments.
Whether you already have an account or not, you will be begin by going to your Business Suite Dashboard>Payment Setup>Payment Settings. Click on Payment Settings.
Once on the Settings Page – click on the Payments tab.
Hit the toggle next to the Stripe- Credit Card (Stripe)
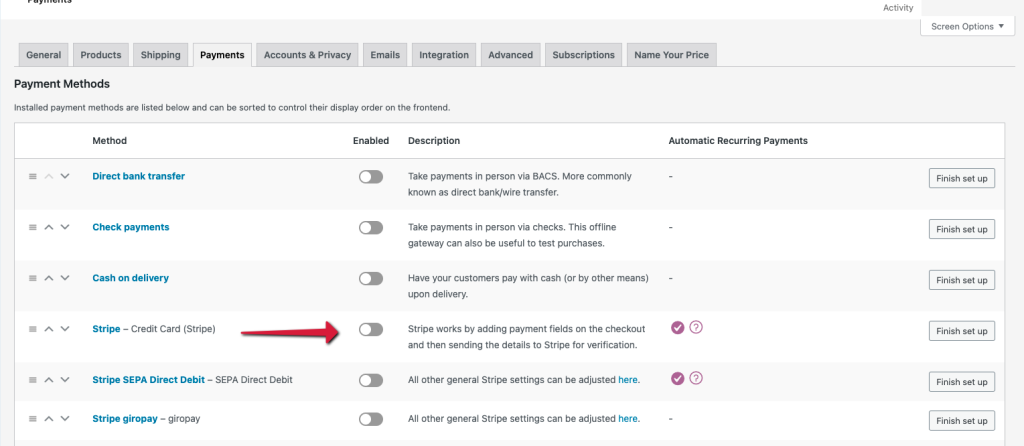
Once you hit the toggle, a page will open that allows you to add your account information or create an account.
Click the Create or connect account button.

After you connect or create your account, you should be redirected back to the Settings for Stripe. If it does not redirect you, go back to the Payments tab and make sure that the toggle is on and then click on the Manage button to change your settings.


- Make Sure that the Enable Stripe box is checked
- Name your method
- Put in the Description how you would like your payment method displayed to your customers
- If you would like to test the system, click the enable test mode and you will be given card numbers for testing
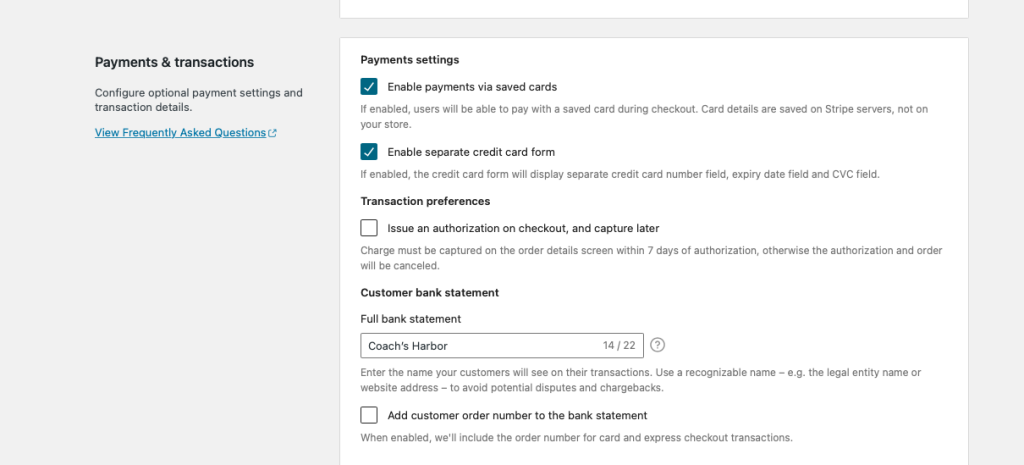
- Check the Enable Payments via saved cards if you want to allow your customers to save their cards
- Check the Enable separate credit card form to display a separate form. (recommended)
- Under Customer bank statement enter what you want to appear on the customer’s credit card statement.