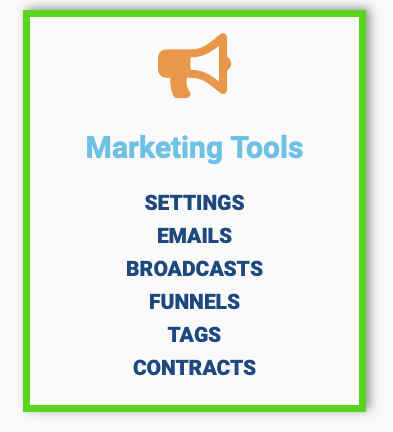
From the Business Suite Dashboard choose: Marketing Tools>Emails.
From this screen, you can select from a list of existing emails, add new, broadcast, or search based on the email name.
Sorting is available based on email type(Alll, Ready, Templates, Draft, Marketing, Transactional, Block Editor, HTML, Trash)
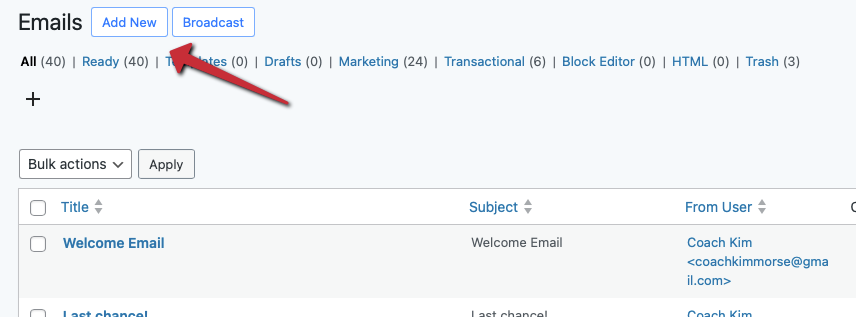
[ Add New ]
- Select a template – Hover over the list of available templates to preview and click to select
- Search for a template – Search by name of available templates
- Import HTML
- Import a template
- Start from Scratch

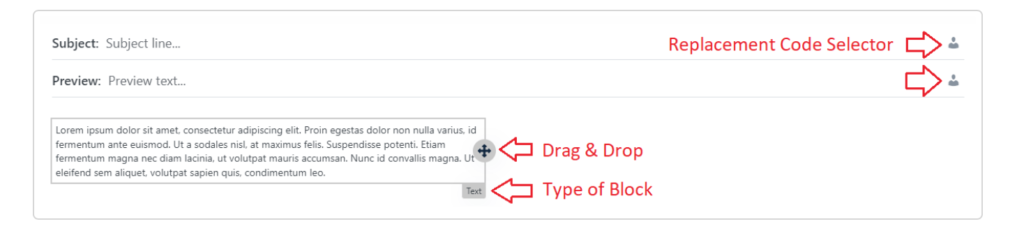
When creating a new email click the “My new email” and name the email. Add a Subject and a Preview.
On the right:
- Undo and redo arrows
Undo: Reverse the last action or series of actions.
Redo: Repeat the action that was previously undone. - Desktop and Mobile preview
Desktop Preview and Mobile Preview allow you to view content on different devices. - Plain text preview
Harbor Marketing automatically creates a text version of the email for you to preview. - [ Send Test ]
You can send a test to several addresses. - Save draft
Allows you to store your work for later editing and refinement. - [ Publish ]

The subject and preview will accept replacement codes.
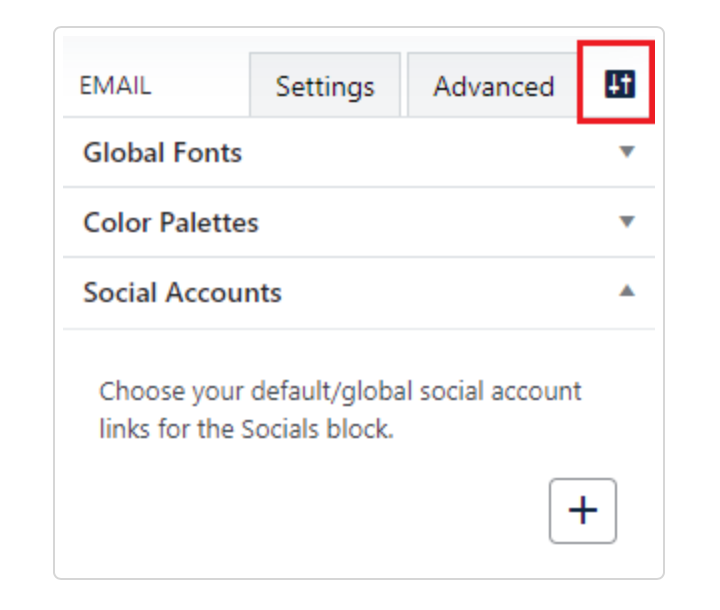
The Email editor is made up of three sections.
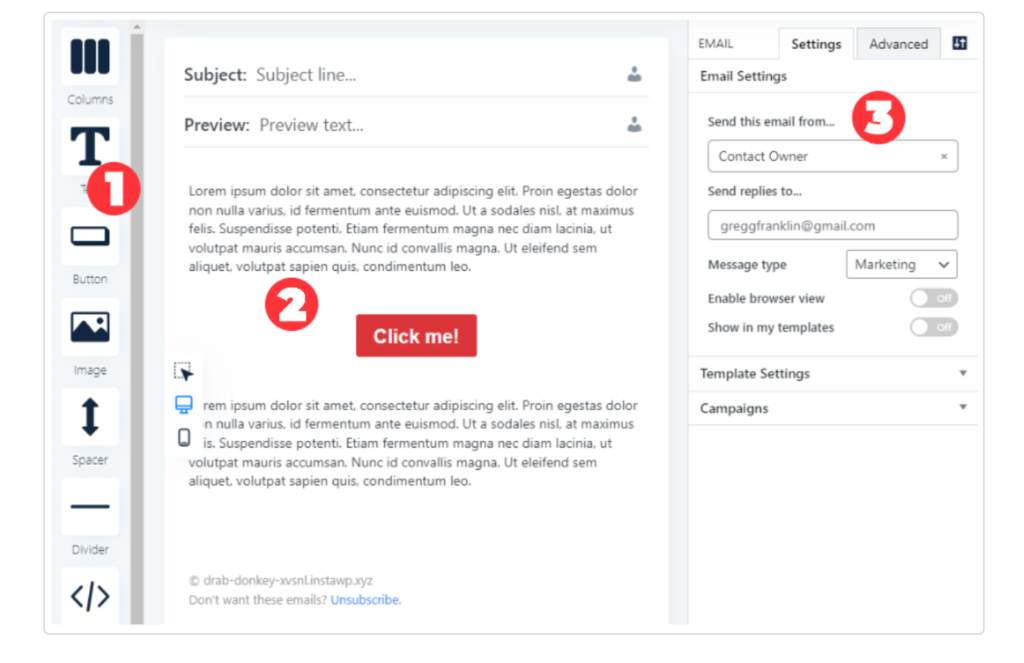
The left column (1) is the block selection containing the following blocks:
All blocks contain:
- Advanced Tab
- Ability to copy and paste a block. It will paste the block after the selected block.
- All blocks can be drag and drop to be sorted, duplicated, and deleted
When hovering over a block a light blue frame will surround the block and it will display the block type in the bottom right corner along with a Compass icon. The pointer with turn to a hand and you can drag and drop the block.
Clicking the block will present a copy page icon for duplicating the block and a trash can icon to delete a block
In the middle column (2) is the content section which contains the subject and preview text.
The last section (3) on the right is the settings section. It’s dynamic and based on what you have selected in the content section will display settings.
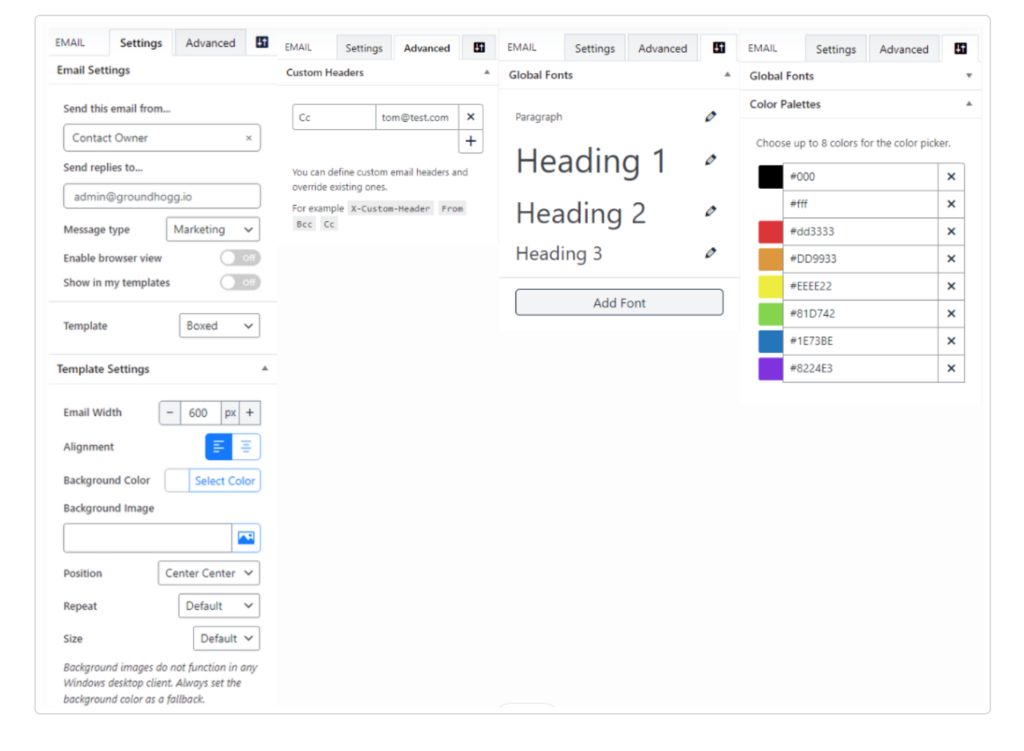
Settings
Send this email from…
You can select a User with the role above Subscriber or the Contact Owner.
Send replies to…
Replies can be set to a User who has a role as Administrator.
Message Type
Select between a Marketing or Transactional. The “Don’t want these emails? “Unsubscribe.” link is removed from the “Transactional Message Type”
Enable browser view
Turning this feature on, a link will be added to the email allowing the contact to view it in their browser.
Show in templates
Turning this on will add the email to your templates.
Template
You can select either “Full-Width”, Full-Width Contained or “Boxed”.
Template Settings
If “Full-Width” is selected
- Background Color – Select a color for the background(Color picker with the global colors)
- Background Image – Select an image from the Media library or upload an image
- Position(Center Center, Center Left, Center Right, Top Center, Top Right, Top Left, Bottom Center, Bottom Right, Bottom Left)
- Repeat(Default, No Repeat, Repeat, Repeat X, Repeat Y)
- Size(Default, Auto, Cover, Contain)
If “Full-Width Contained” is selected
If “Boxed” is selected additional settings are available.
- Email Width – Set the width of the email
- Alignment – Select Left or centered
Advanced
Custom Headers
You can add a custom header for From, Bcc, Cc, etc. Example: Key: Bcc Value: tom@test.com
The last tab is Editor Control